
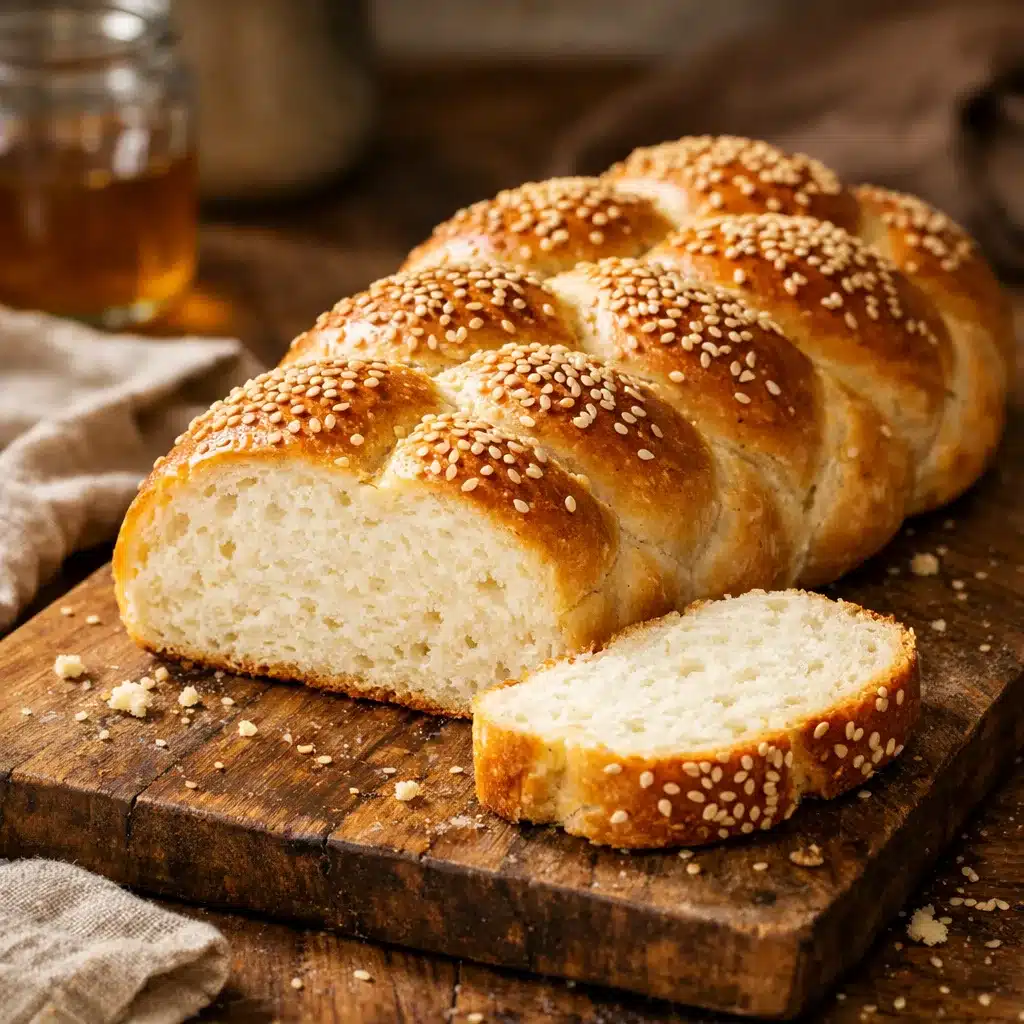
Challah was the bread my grandmother made for every Friday night Shabbat dinner. The smell of it baking — eggs and honey and warmth — meant the weekend had started. When I went gluten free, challah was the recipe I missed most. Not just the taste, but the ritual of making it. This recipe brought that ritual back.
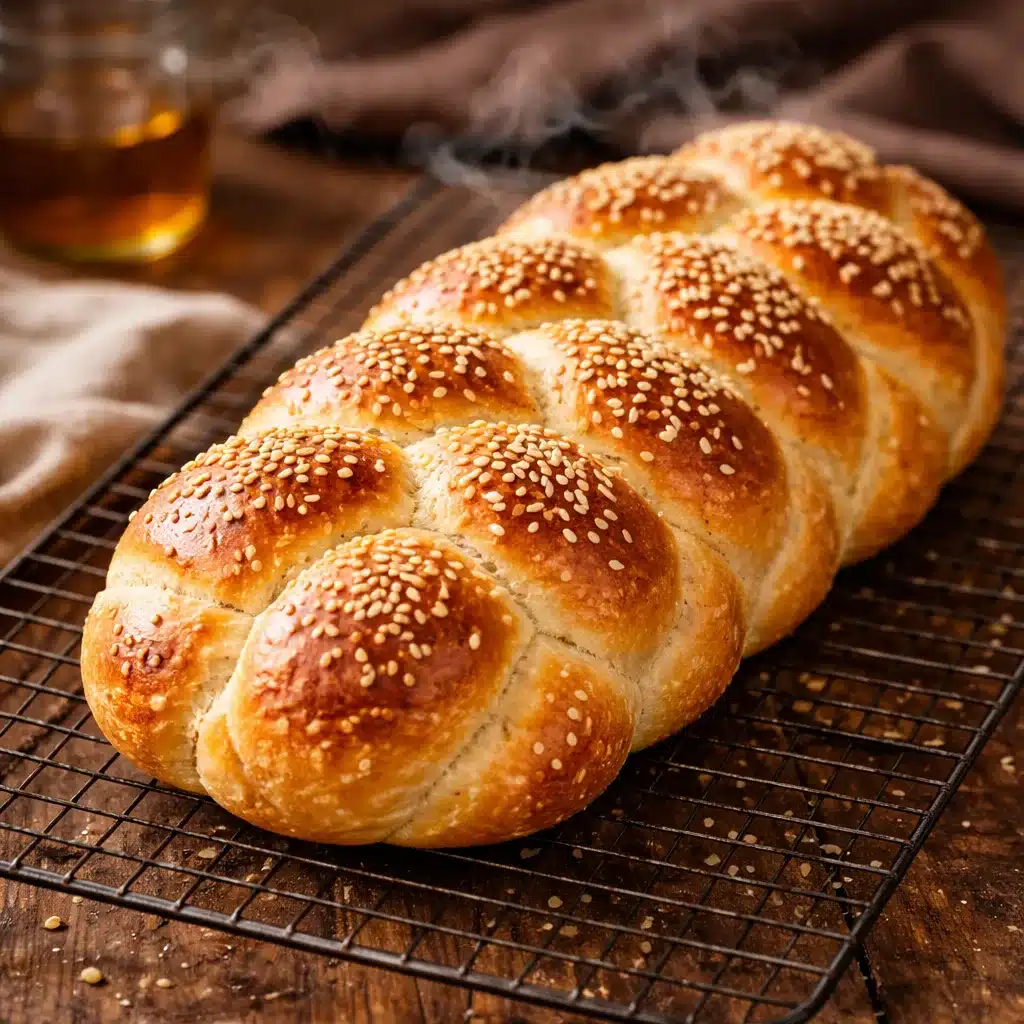
This gluten free challah bread recipe produces a soft, slightly sweet braided loaf with a golden crust and a pillowy crumb that pulls apart beautifully at the table. It is made with eggs, honey, and oil — the classic enriched dough that gives challah its characteristic richness and signature texture. And it is completely gluten free.
I want to be honest with you before we start: this gluten free challah bread takes time. Not complicated time — most of it is resting and rising — but you should plan for about three and a half hours from start to finish. Every one of those minutes is worth it. The result is the kind of bread you bring to the table and watch people reach for before anything else.
I make gluten free challah bread for holidays — Rosh Hashanah, Passover, Easter, Thanksgiving — but also for ordinary Sunday mornings when I want something that feels like a celebration. It is equally perfect sliced and toasted with butter, or used the next day for French toast that will change your morning completely.
This gluten free challah bread holds its shape during braiding, rises beautifully in the oven, and slices cleanly once cooled. Here is every detail you need to make it work the first time.
When I want something simpler for a weekday morning, our gluten free pancake recipe or gluten free pumpkin waffles are always there — but nothing replaces the ritual of a braided loaf on the table.
Table of Contents
Table of Contents
What Is Gluten Free Challah Bread?
Traditional challah is an enriched gluten free challah bread made with eggs, oil, and honey — a Jewish bread traditionally prepared for Shabbat and holiday celebrations. The enriched dough gives it a soft, tender crumb and a slightly sweet flavor that is unlike any other bread. The braided shape is both decorative and symbolic — representing togetherness and the interweaving of life.
Our homemade gluten free challah bread version uses a gluten free flour blend and psyllium husk to recreate the structure that gluten normally provides. The psyllium husk binds the dough, gives it elasticity, and allows it to hold the braided shape during the second rise and baking. The eggs and honey do the rest — creating the rich, golden, tender crumb that makes challah so beloved.
This is a dairy free recipe as written — traditional challah is dairy free to comply with kosher dietary laws that separate milk and meat. If you do not follow these restrictions, you can substitute melted butter for the vegetable oil for an even richer flavor.
If you are new to gluten free bread baking, start with our complete gelatin trick gluten free guide to understand how gluten free bread structure works before diving into an enriched dough like challah.
Gluten Free Challah Bread — Ingredients
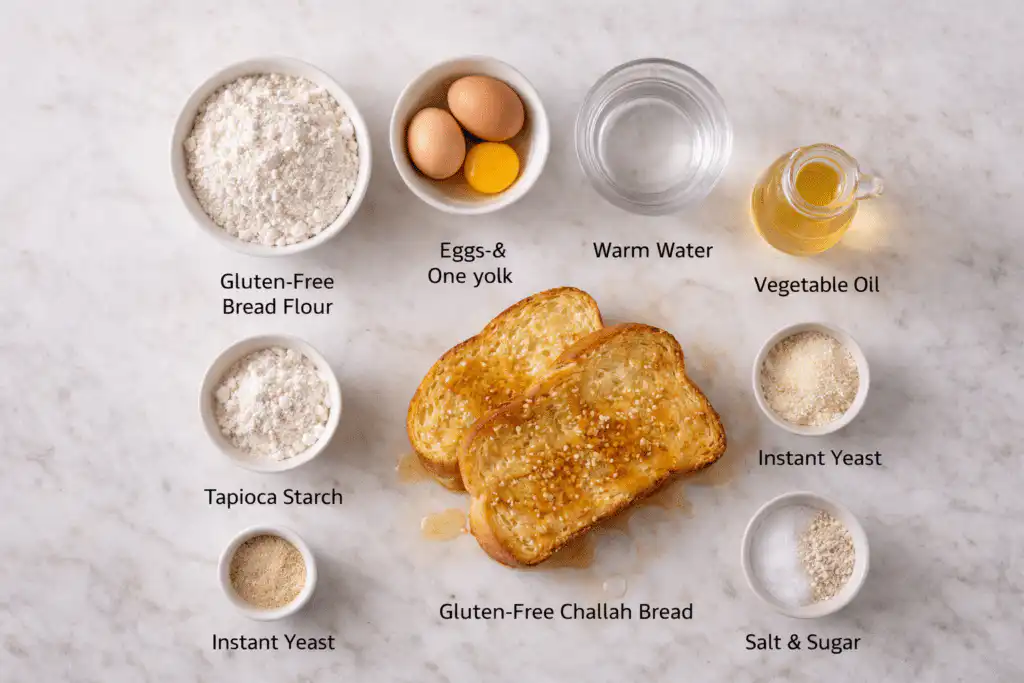
Here is everything your gluten free challah bread needs:
Dry Ingredients
- 2¼ cups (320g) gluten free bread flour blend — see flour notes below
- ⅓ cup (45g) tapioca starch
- 2 teaspoons kosher salt
- 3 tablespoons granulated sugar
- 2 teaspoons instant yeast
- 2 tablespoons psyllium husk powder — do not reduce
Wet Ingredients
- 2 large eggs, room temperature
- 1 large egg yolk, room temperature
- 1 cup (240ml) warm water — 105 to 110°F
- ¼ cup (55ml) vegetable oil or light olive oil
- 2 tablespoons honey
Egg Wash and Topping
- 1 large egg + 1 tablespoon water — whisked together
- Sesame seeds or poppy seeds — optional but beautiful
Ingredient Notes
Psyllium Husk Powder — Do Not Skip or Reduce
Psyllium husk powder is the structural backbone of this recipe. It absorbs liquid, forms a thick gel, and gives the dough the elasticity it needs to be braided without tearing and to hold its shape during the second rise and baking. Do not substitute psyllium husk flakes for powder — they are different products and the recipe will not work correctly with flakes.
Room Temperature Eggs
Cold eggs can cause the warm yeast mixture to seize up and can create an uneven dough texture. Take your eggs out of the refrigerator 30 minutes before starting. Room temperature eggs also produce a lighter, more tender crumb in enriched bread dough.
Honey
Honey is not optional in challah — it is part of the flavor signature. It also feeds the yeast and helps with browning. Do not substitute white sugar. If you need a vegan version, use maple syrup as a 1:1 substitution.
Psyllium husk has been studied for its structural role in gluten free baking. See peer-reviewed research on psyllium husk in gluten free bread for the science behind its binding properties.
Gluten Free Challah Bread
Ingredients
Method
- Step 1 — Activate the Yeast
- Combine warm water, sugar, and instant yeast.
- Stir gently. Rest 5-10 minutes until foamy.
- No foam = inactive yeast. Start again.
- Step 2 — Form the Psyllium Gel
- Add psyllium husk powder to foamy yeast.
- Stir well. Rest 5 minutes until gel forms.
- This gives the dough its elasticity.
- Step 3 — Mix the Dough
- Whisk flour, tapioca starch, and salt in
- stand mixer bowl. Beat eggs and yolk. Add
- eggs, oil, honey, and yeast-psyllium mixture.
- Mix with paddle on medium 4-5 minutes until
- smooth and thick. Rest 10-15 minutes.
- Step 4 — First Rise
- Cover bowl. Rise in warm place 45-60 minutes
- until visibly puffed. Will not double in size.
- Step 5 — Chill the Dough
- Refrigerate 20-30 minutes. This firms the
- dough and makes braiding possible.
- Step 6 — Shape and Braid
- Oil hands generously. Divide dough into 3
- equal portions (~270g each). Roll each into
- 12-14 inch rope on parchment-lined sheet.
- Braid loosely — pinch tops, cross right over
- center, cross left over center, repeat.
- Pinch and tuck ends underneath.
- Step 7 — Second Rise
- Cover loosely. Rise 30-45 minutes until
- slightly puffed. Preheat oven to 350°F.
- Step 8 — Egg Wash and Bake
- Whisk egg + water. Brush gently over loaf.
- Sprinkle sesame seeds if using.
- Bake 25-30 minutes until deep golden brown.
- Tent with foil if browning too quickly.
- Step 9 — Cool Completely
- Transfer to wire rack. Cool minimum 45
- minutes before slicing. Do not cut early —
- crumb sets as it cools.
Notes
– Always use oiled hands for shaping
– Braid loosely — tight braids restrict rise
– Chill step is essential for braiding
– Cool fully before slicing — minimum 45 min
– Day-old challah = exceptional French toast
– Dairy free as written — sub butter for oil
for richer flavor (non-kosher version)
– Freeze slices up to 2 months
– King Arthur GF Bread Flour recommended
How to Make Gluten Free Challah Bread — Step by Step
Step 1: Activate the Yeast
The gluten free challah bread dough starts with an active yeast mixture. In a small bowl, combine the warm water (105 to 110°F — warm to the touch but not hot), sugar, and instant yeast. Stir gently and leave for 5 to 10 minutes until the surface is foamy and bubbly. If your mixture does not foam, your yeast is not active — do not proceed. Start again with fresh yeast.
Olivia’s note: I test my yeast every time, even instant yeast. Gluten free bread is too much work to discover at the end that your yeast was the problem. Foam means go.
Step 2: Form the Psyllium Gel
Add the psyllium husk powder to the foamy yeast mixture and stir well. Leave for 5 minutes. The mixture will thicken into a gel-like consistency — this is exactly what you want. This psyllium gel is what gives the dough its elasticity and structural strength.
Step 3: Mix the Dough
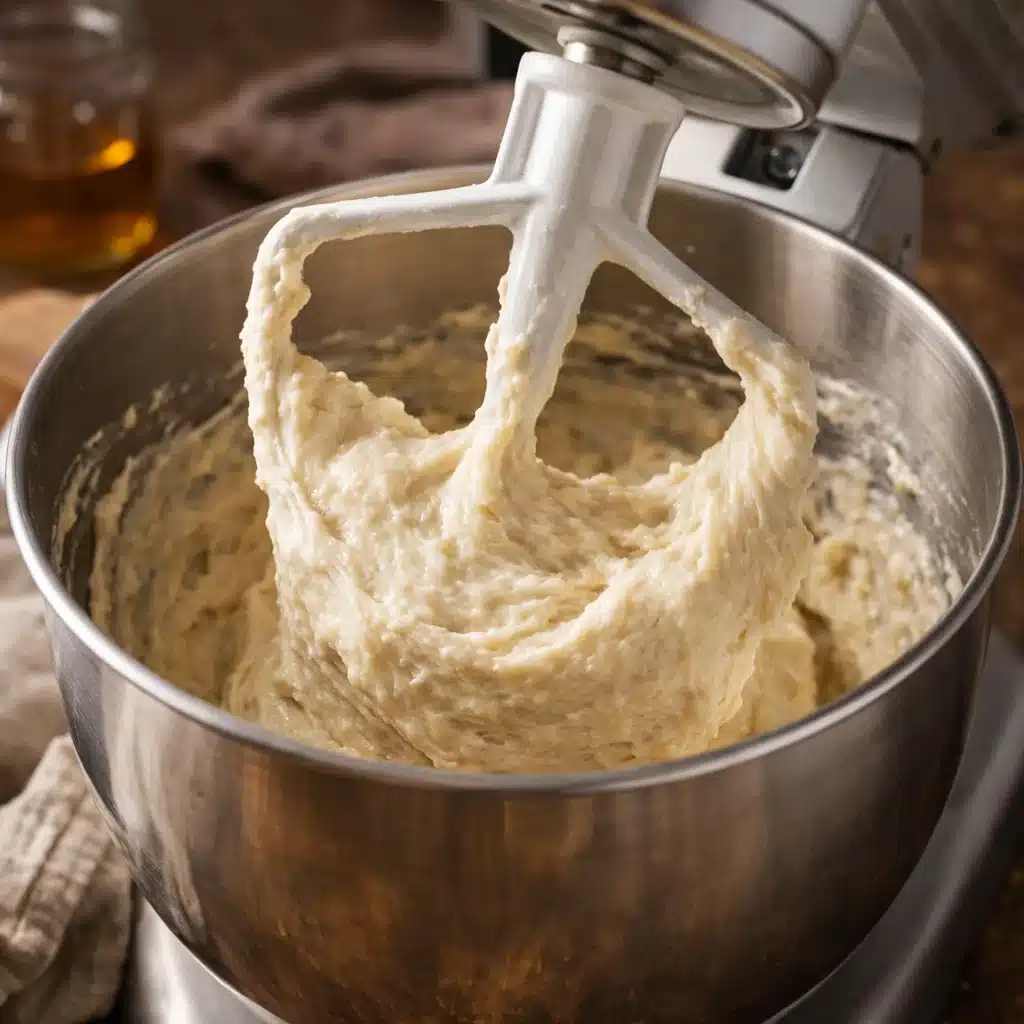
In the bowl of a stand mixer, whisk together the gluten free bread flour, tapioca starch, and salt. Lightly beat the eggs and egg yolk, then add them to the flour mixture along with the oil, honey, and the yeast-psyllium mixture. Using the paddle attachment, mix on medium speed for 4 to 5 minutes. The gluten free challah bread dough rises best when the dough has been properly mixed — it should be smooth, thick, and sticky, resembling a very thick batter more than traditional bread dough. Let the dough rest in the bowl for 10 to 15 minutes to fully hydrate.
Do not be alarmed by the texture. Gluten free enriched dough is genuinely stickier and softer than wheat dough. This is correct. It will firm up significantly during the first rise and especially after chilling.
Step 4: First Rise
Cover the bowl with plastic wrap or a clean kitchen towel and place in a warm, draft-free spot for 45 to 60 minutes. The dough will look visibly puffed and aerated, though it will not double in size the way wheat bread dough does. This is expected with gluten free dough.
Warm spot tip: I preheat my oven to 100°F, turn it off, and place the covered bowl inside with the door slightly ajar. This consistent warmth gives the most reliable rise.
Step 5: Chill the Dough
Transfer the bowl to the refrigerator for 20 to 30 minutes. This is the step that makes braiding possible. The chill firms the dough significantly, making it much easier to roll into ropes and braid without it spreading or sticking to your hands.
Step 6: Shape and Braid
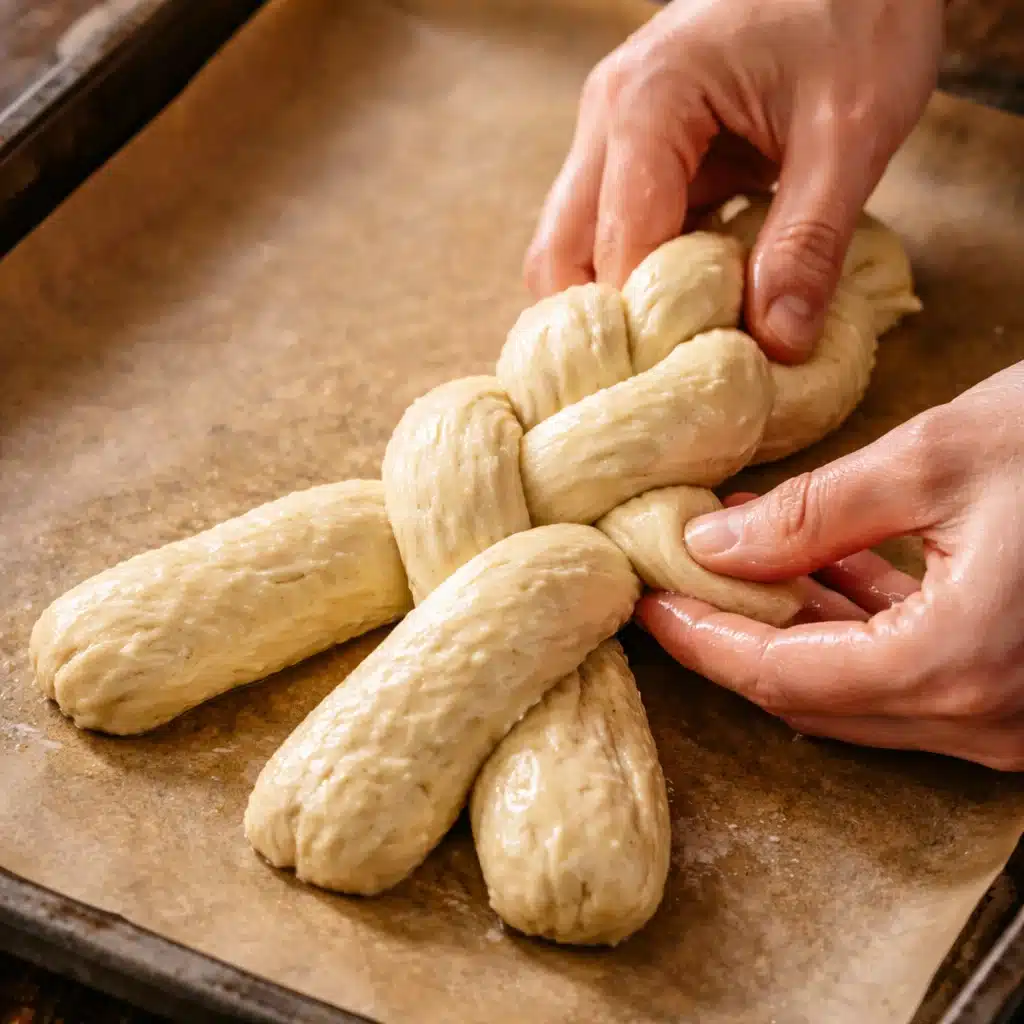
Oil your hands generously — more than you think you need. Divide the chilled dough into 3 equal portions (approximately 270g each). On a parchment-lined baking sheet, gently roll and pat each portion into a rope about 12 to 14 inches long. For the gluten free challah bread braid:
- Pinch the tops of all three ropes together firmly.
- Cross the right rope over the center rope.
- Cross the left rope over the new center rope.
- Continue alternating sides until the loaf is braided.
- Pinch the ends together and tuck them underneath.
Braid loosely — a tight braid will restrict the rise during the second proof and can cause the loaf to split unevenly during baking. Leave some room for the bread to expand.
Step 7: Second Rise and Bake
Cover the braided loaf loosely with plastic wrap and let it rise for 30 to 45 minutes until slightly puffed. Meanwhile, preheat the oven to 350°F (180°C). Brush the loaf gently with egg wash and sprinkle with sesame seeds if using. Gluten free challah bread bakes at 350°F for 25 to 30 minutes until deep golden brown and sounding hollow when tapped on the bottom. If the top is browning too quickly, tent loosely with foil.
Cool completely on a wire rack before slicing — minimum 45 minutes. Gluten free bread continues to set as it cools. Cutting too early results in a gummy, compressed crumb. I know it is hard to wait. Wait anyway.
Olivia’s Tips for Perfect Gluten Free Challah Bread
These are the details that make the biggest difference in gluten free challah bread structure and final texture:
- Oil your hands before every braid attempt — gluten free challah bread dough is sticky by nature and oiled hands make shaping possible
- Do not skip the chill step — it transforms an unworkable dough into something you can actually braid
- Braid loosely — tight braids restrict rise and cause splitting
- Place biscuits touching on the pan — err on the side of a looser braid and let the oven do the puffing
- Use a kitchen scale — equal rope weights produce an even braid that bakes uniformly
- Tent with foil if the top browns before the center is done
- Cool fully before slicing — this is the single most important instruction in the recipe
- Day-old challah makes the best French toast of your life — plan accordingly
For another bread that benefits from the same technique principles, try our gluten free sourdough bread — the cooling rule is identical and equally important.
The Best Flour for Gluten Free Challah Bread
The gluten free challah bread flour blend you choose affects both the structure and the texture of the final loaf. Here are the options I have tested and their specific adjustments:
| Flour Blend | Amount | Water | Expected Result |
| King Arthur GF Bread Flour | 320g | 240ml | Best rise, clearest braid, recommended |
| King Arthur Measure-for-Measure | 320g | 220–230ml | Slightly softer crumb, good braid |
| Bob’s Red Mill 1-to-1 | 320g | 250–260ml | Tender interior, shape loaf taller |
Whichever GF challah bread flour option you choose, always measure by weight rather than volume. Gluten free flour blends are denser than all-purpose wheat flour and volume measurements can vary significantly depending on how the flour has settled. A kitchen scale gives you consistent, reliable results every time.
For more information on gluten free bread flour options and how they perform in yeast breads, visit the King Arthur Gluten Free Baking Guide.
Gluten Free Challah Bread Variations
Raisin Challah
For the traditional Rosh Hashanah round challah, make the gluten free challah bread raisin version: gently fold ⅓ cup of golden raisins into the dough after the first rise, before chilling. Shape into a round coiled loaf rather than a braid for the holiday presentation. The sweetness of the raisins pairs beautifully with the honey in the dough.
Chocolate Chip Challah
The GF challah bread chocolate chip version is my children’s most requested recipe. Press ⅓ cup of mini chocolate chips lightly into the dough ropes before braiding — adding them after the braid is formed can cause tearing. The chips melt into the dough during baking and create pockets of richness throughout the loaf.
Poppy Seed Challah
Replace the sesame seeds with poppy seeds in the egg wash topping. The poppy seeds add a slightly nutty, earthy flavor that complements the sweetness of the enriched dough beautifully.
Garlic and Herb Challah
Add 1 teaspoon of garlic powder and 1 teaspoon of dried rosemary to the dry ingredients before mixing. Replace the honey with 1 tablespoon of sugar for a more savory result. This version is spectacular alongside soups, stews, and roasted meats.
For more savory gluten free bread ideas, try our fabulous Italian bread gluten free or our gluten free hamburger buns — both are made with simple ingredients and reliable results.
How to Serve Gluten Free Challah Bread
The ways I love to put gluten free challah bread at the table:
- Warm from the oven with softened butter and a drizzle of honey
- Sliced and served alongside a holiday meal in place of dinner rolls
- Toasted the next morning with cream cheese and jam
- Made into French toast the day after baking — see the note below
- Used as sandwich bread for egg salad or turkey the day it is made
- Served at Shabbat dinner with soup and roasted chicken
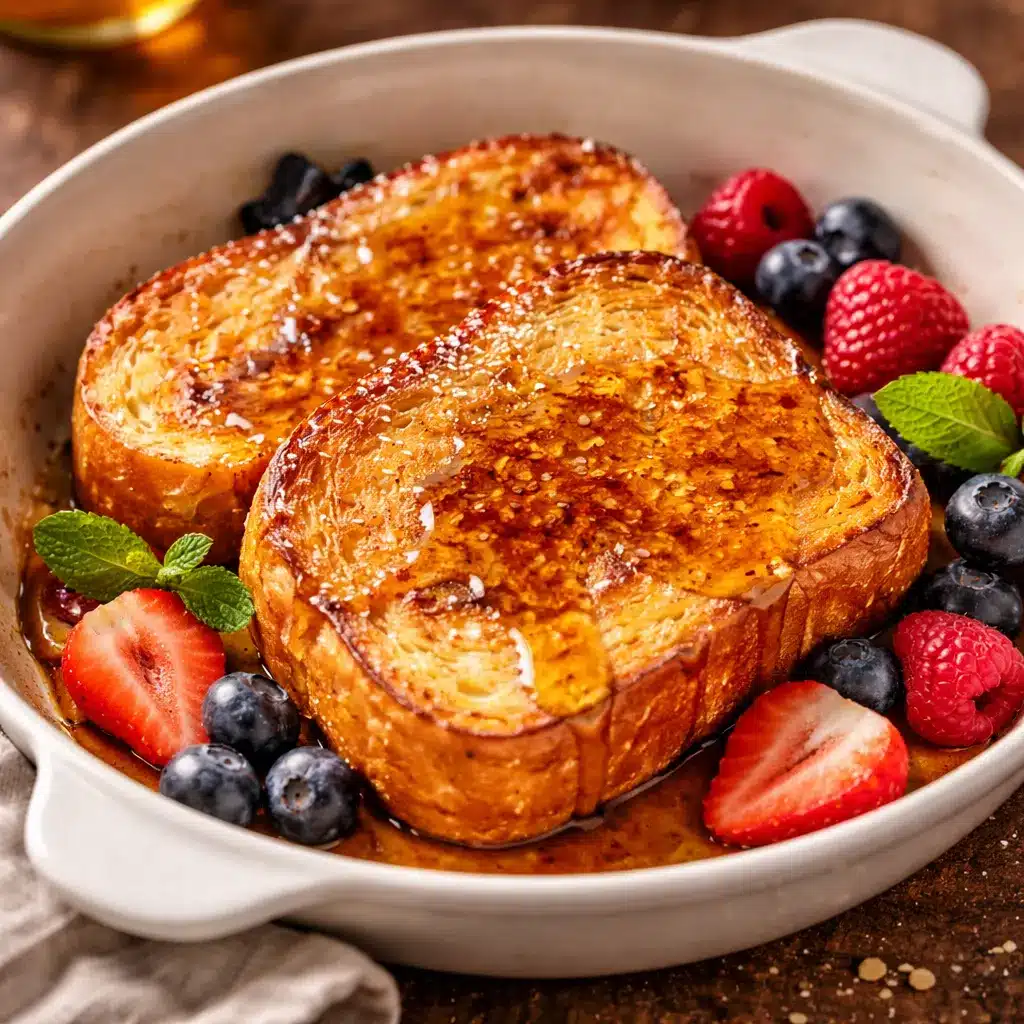
Day-old gluten free challah makes genuinely exceptional French toast. The enriched dough absorbs the egg and milk mixture without falling apart, and the honey in the bread caramelizes as it cooks to create edges that are crisp and golden and deeply flavored. Use thick slices, soak for 2 minutes per side, and cook on medium heat in butter until golden. Serve with maple syrup and fresh berries.
This challah also pairs beautifully alongside our gluten free creamy chicken casserole or a simple dairy free ranch dressing for dipping — two of our most-made weeknight recipes.
Storing Your Gluten Free Challah Bread
Your gluten free challah bread stays fresh at room temperature for up to 2 days when wrapped tightly in plastic wrap or stored in an airtight container. Gluten free bread does not keep as long as wheat bread, but challah’s enriched dough helps it retain moisture longer than most gluten free loaves.
Freezing
Slice the fully cooled loaf and wrap slices individually or in portions in plastic wrap, then transfer to a freezer-safe bag. Freeze for up to 2 months. Thaw at room temperature or warm gently in the oven at 325°F for 8 minutes. Do not microwave from frozen — it makes the texture gummy.
For a quicker holiday bread option, our gluten free dinner rolls and gluten free crescent rolls are ready in a fraction of the time and just as welcome at the table.
Gluten Free Challah Bread — FAQs
Is gluten free challah bread hard to make?
It is not difficult, but it does require patience and timing. The most challenging part is the braiding step, which becomes much easier after the dough has been chilled. The chill is the single most important step for manageability. Follow the timeline, use oiled hands, and braid loosely — the result is worth every minute.
What are the best gluten free challah bread braiding tips?
The most important gluten free challah bread braiding tips are: chill the dough for at least 20 minutes before shaping, oil your hands generously and re-oil them between ropes if needed, braid loosely rather than tightly, and work on parchment paper so the loaf does not need to be moved after braiding. If a rope tears, press it back together with oiled fingers and continue — the braid does not need to be perfect to bake beautifully.
Is gluten free challah bread dairy free?
Yes — this gluten free challah bread dairy free recipe is written without any dairy ingredients. Vegetable oil replaces butter, and there is no milk in the dough. Traditional challah is dairy free by religious dietary law, and this recipe honors that tradition. If you are not keeping kosher and want a richer flavor, you can substitute melted unsalted butter for the vegetable oil.
Can I make gluten free challah bread without a stand mixer?
Yes, but it requires effort. Use a large bowl and a sturdy wooden spoon or silicone spatula to mix the dough vigorously for 4 to 5 minutes. The dough is sticky and thick, which makes hand mixing tiring but achievable. A hand mixer with the dough hook attachment is a good middle option if you do not have a stand mixer.
Why did my challah crack during baking?
Cracking usually happens because the braid was too tight, the second rise was too short, or the oven temperature was too high. Braid loosely, allow a full 30 to 45 minutes for the second rise, and confirm your oven temperature with an oven thermometer before baking.
A Note from Olivia
Bread has always been more than food in my family. It is how we mark time — holidays, weekends, ordinary Tuesdays that become special because someone took the time to bake. This challah carries that tradition forward, without the gluten and without the compromise. Make it for someone you love. Make it for yourself. It is worth the afternoon.
This gluten free challah bread recipe is one of the recipes I am most proud of at The Savory Hearth. It took many batches to get the texture, the rise, and the braiding exactly right. If something is not working for you, leave a comment below with the details and I will help you figure it out. I want this recipe to work for you as much as it works for me.
With warmth from my kitchen to yours. — Olivia Carter, The Savory Hearth
Happy baking. — Olivia Carter, The Savory Hearth